HomeAssistant 组件结构

HomeAssistant 组件结构
Edmend ZhangHS 组件结构
- Event Bus: facilitates the firing and listening of events – the beating heart of Home Assistant.
- State Machine: keeps track of the states of things and fires a
state_changedevent when a state has been changed. - Service Registry: listens on the event bus for
call_serviceevents and allows other code to register services. - Timer: sends a
time_changedevent every 1 second on the event bus.
home assistant javascript card
1 | type: custom:button-card |
https://hacloud.fun/archives/UI%E5%8D%A1%E7%89%87%E6%95%99%E7%A8%8B
core 源码 : https://github.com/home-assistant/core/tree/master
代码运行解析
Docker Desktop安装在Windows上时,它可以配置为使用WSL2作为其后端。Docker引擎在WSL2的Linux内核上运行,不是通过传统的Hyper-V虚拟机。
main
argparse
faulthandler【错误记录的包,C语言编写 处理错误日志】
os 和 sys用于操作系统和系统级操作
threading 县城管理
错误日志文件的名称 FAULT_LOG_FILENAME
“Home Assistant only supports Linux, OSX and Windows using WSL”
1 | validate_os() 验证操作系统 |
1 | def __init__(self, hass: HomeAssistant) -> None: |
用户,用户组,用户身份,相关的用户token都进行了一次保存,而且是以json 的形式保持到了文件中
User 等保存是直接以json的形式直接保存到文件中。设备的检测历史默认保存在sqlite中
home-assistant_v2.db
插件开发
拉环境 下载hass开发依赖
git pull & git checkout
pip3 install -r requirements_all.txt
1
homeassistant` --> `components
在testes new components-test 目录 添加测试用例
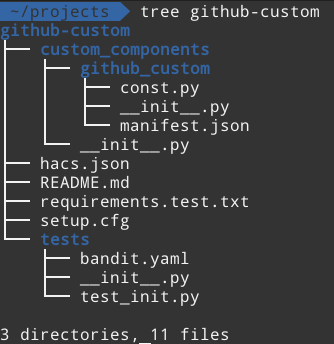
- Add our requirements to the
manifest.json. If we need to add an external python dependency, it needs to be added here. - Add our platform configuration schema. This will define what values we will expect when a user adds this integration in their
configuration.yaml. - Register all of our sensors with Home Assistant. This will be done in our
async_setup_platformfunction. - Create a new entity that represents the state and data we want to collect about each GitHub repository. This entity should also implement the
async_updatemethod that updates the data from GitHub.
测试
1 | pip install pytest-homeassistant-custom-component |
providing a hass instance that is properly setup for your test environment.
1 | async def test_flow_user_step_no_input(hass): |
Comment
匿名评论隐私政策
✅ 你无需删除空行,直接评论以获取最佳展示效果


